how to sign up for naver account? Naver is one of the most widely used apps in Korea, offering a variety of services. By registering as a member, you gain access to many more services compared to non-members. Members are categorized into two types: those with a nickname ID and those with a real-name verified ID. Real-name ID can use all of Naver’s services, including those that require a payment system, but must undergo additional verification steps using an I-PIN or a mobile phone registered in their name. Nickname IDs, which have not completed the real-name verification process, have restricted access to some services.
- Services available with a Nickname ID: Mail, blogs, messages, and other personal area services.
- Services not available with a Nickname ID: Shopping & Pay, MYBOX, VIBE, Series, Webtoons, Advertising (Integrated Advertising Center, Search Advertising, Performance-based Display Advertising), and other payment-included services.
If you already have a nickname ID and wish to change to a real-name ID, please click the link below.
How to Verify a NAVER Account
Case 1. Signing up for Naver account on PC Version
Naver allows you to sign up by clicking the registration button on both PC and mobile versions.
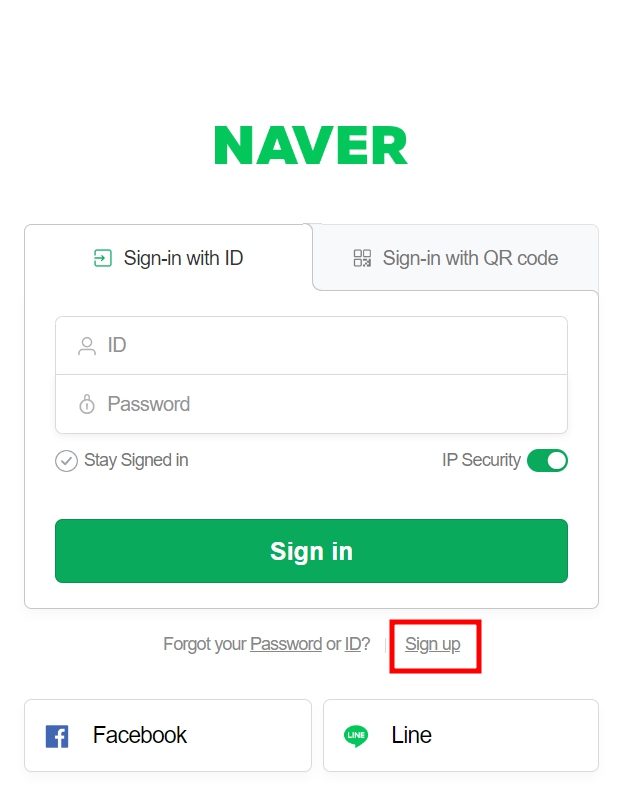
1) Click the ‘Sign up’ button on the Naver account registration page.
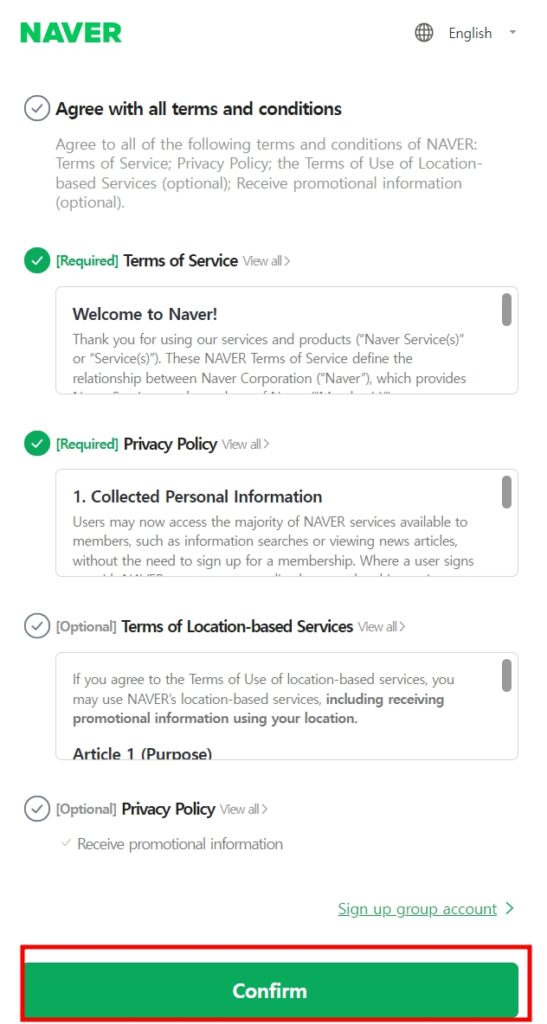
2) Agree to the required terms such as the ‘Terms of Service’ and ‘Privacy Policy’, then click the ‘Confirm’ button to proceed.
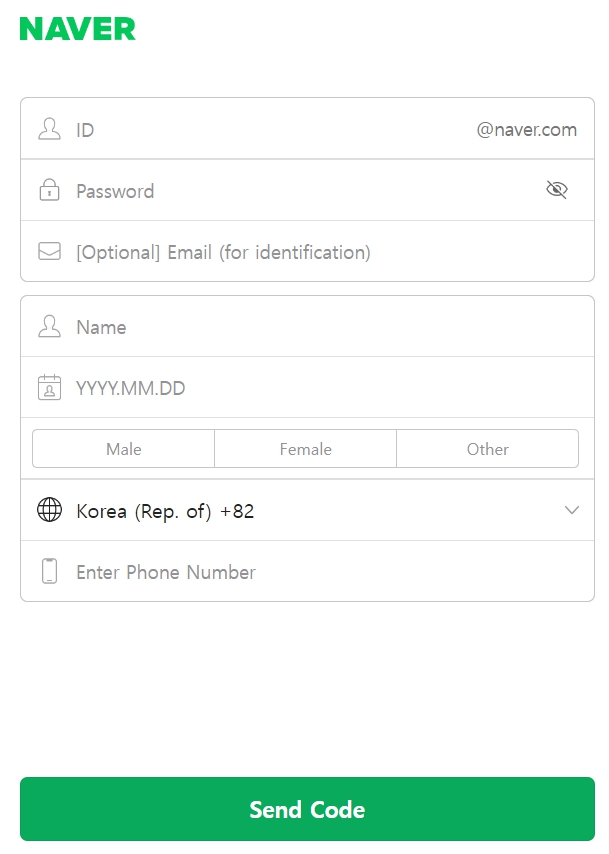
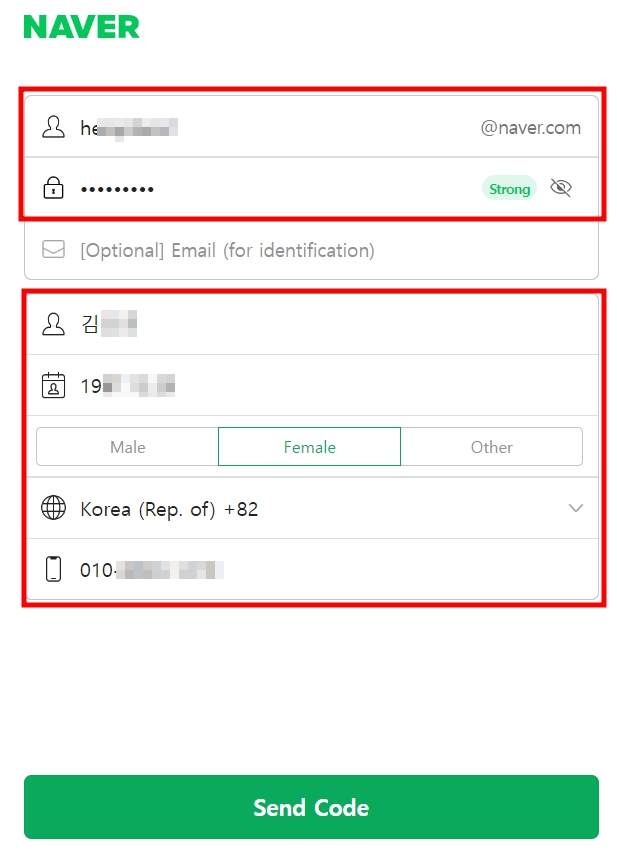
3) Enter your ID, password, name, date of birth, and phone number, which are all required fields except for the optional email, and then click the ‘send code’ button.
This is a registration page for creating a nickname ID, meaning you can use a nickname or someone else’s name in the name field to sign up. Be careful when entering the name as it cannot be changed unless it is converted to a real name later. The phone number is only used to verify whether text messages can be received and is not related to the subscriber’s actual identity.
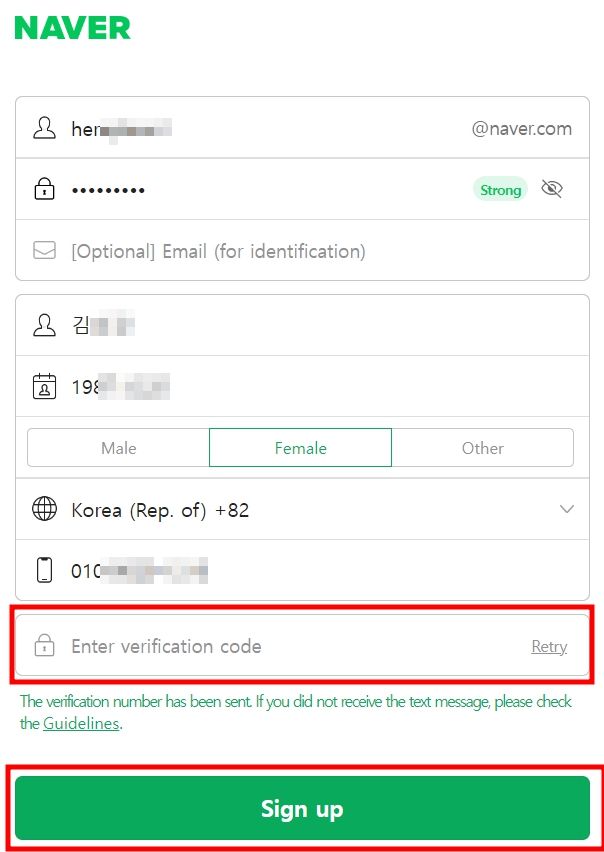
When you click the ‘send code’ button, a field to enter the verification code will appear, and you should enter the code in this field.
The verification number has been sent. If you did not receive the text message, please check the Guidelines.
-. Have you entered the correct information?
Please make sure the information you entered is correct.
If you did not receive the text message even if you entered the correct information, please try again after checking the spam settings to see whether you have blocked text messages starting with 1588.
Even when the number has not been blocked on your mobile phone, the number 1588 may be automatically blocked by the wireless service carrier you are using. Please check with the carrier you are using to see if a verification text message is properly sent to your phone.
-. Have you signed up recently?
You can only register a certain number of accounts in NAVER during a specific period through mobile phone number verification.
Please use the account that you previously registered.
If you do not remember the account that you registered, please go to “Forgot NAVER ID?” and check the list and number of registered accounts signed up with the mobile phone and the identity-verified e-mail address registered in the account information.
-. Do you have more than three registered accounts?
NAVER allows a maximum of three accounts to be registered. (Including individual and group accounts). Please use the account that you previously registered.
If you do not remember the account that you registered, please go to “Forgot NAVER ID?” and check the list and number of registered accounts signed up with the mobile phone and the identity-verified e-mail address registered in the account information.
If there are less than two registered accounts from “Forgot NAVER ID?” then the previous user of your current mobile phone number might have exceeded the number of times for mobile authentication when signing up. In this case, you need to submit evidential documents verifying that you are the current owner of the phone number. The evidential documents can be issued from a nearby wireless service carrier store or the carrier’s homepage.Submit evidential documents for mobile phone owner authentication
Case 2. Signing up for Naver account on mobile version – naver app
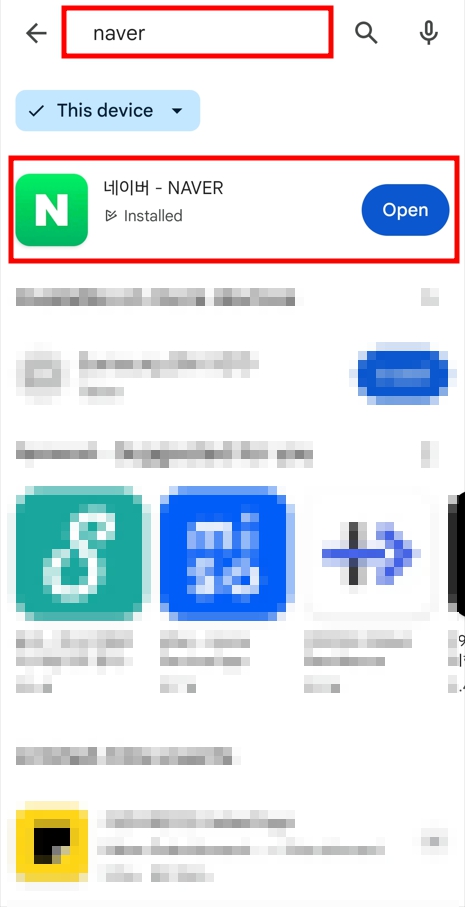
To sign up in naver app, you first need to install the Naver application. Please download Naver from the Play Store or App Store. 1) Access the Play Store and search for “naver” in the search bar. Click “install” to download Naver, and then click “open” to launch the app.
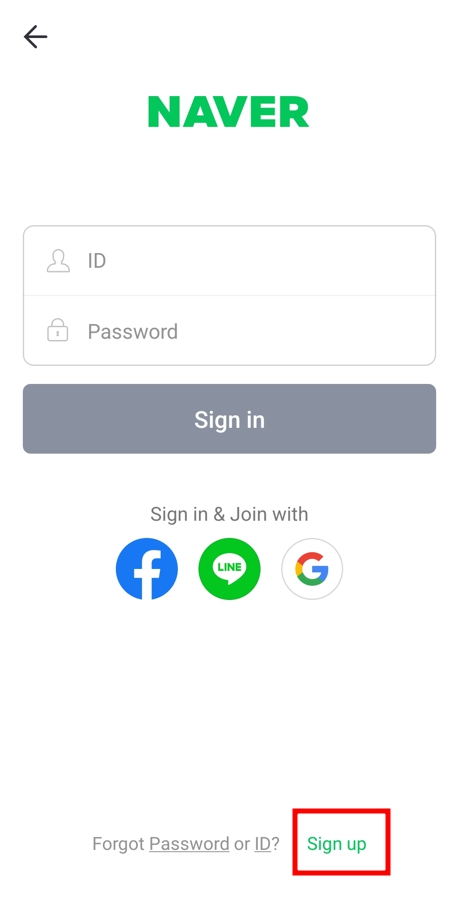
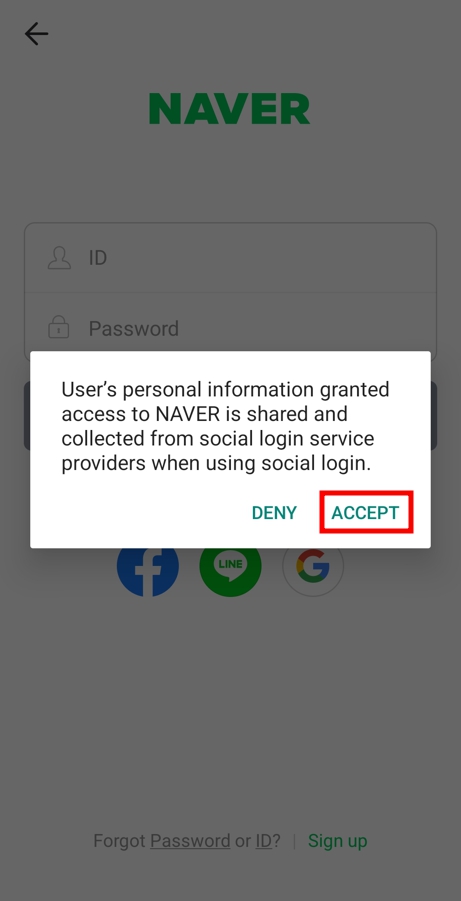
You can find the ‘Sign Up’ button at the bottom of the login page. Clicking this button displays a notice about personal information collection for social login, and clicking ‘Accept’ will take you to the registration page.
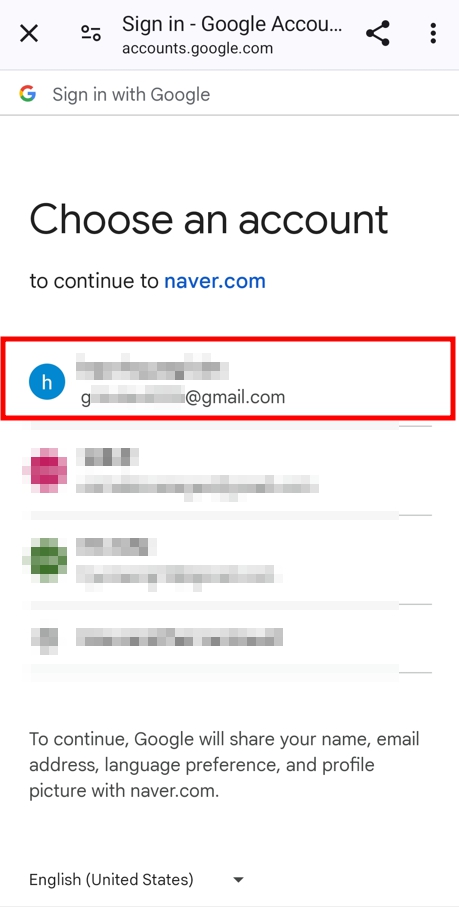
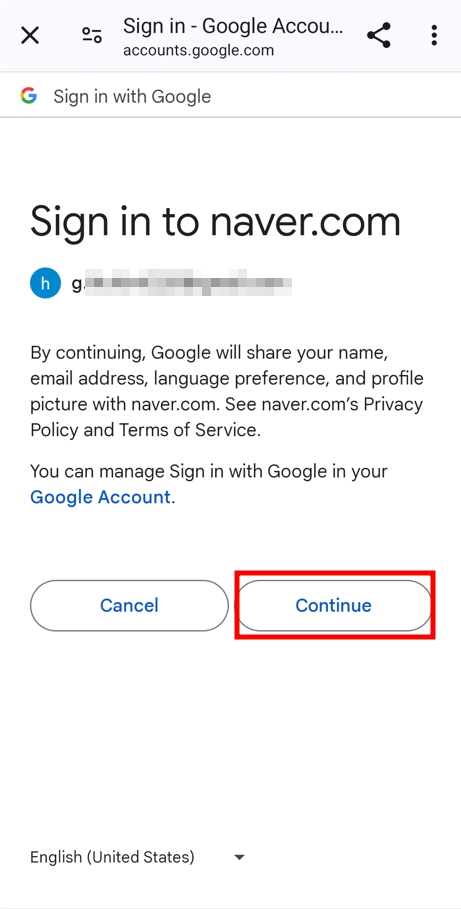
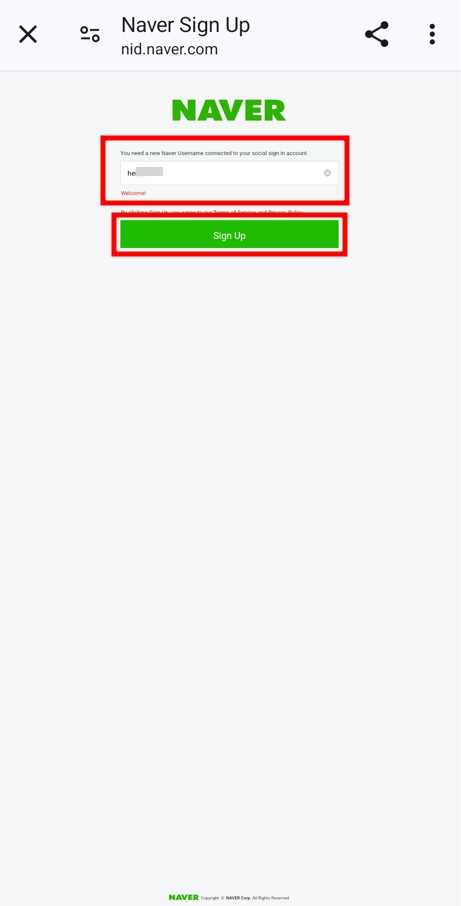
This is the social login page where you can easily log in using your Google ID. After selecting your Google account, press ‘Continue’ on ‘sign in to naver.com’ to proceed to the ID creation page. Enter the Naver ID you wish to create, and it will immediately check for duplicates. If the ID is not duplicated, you can easily complete the registration by pressing the ‘Sign Up’ button.
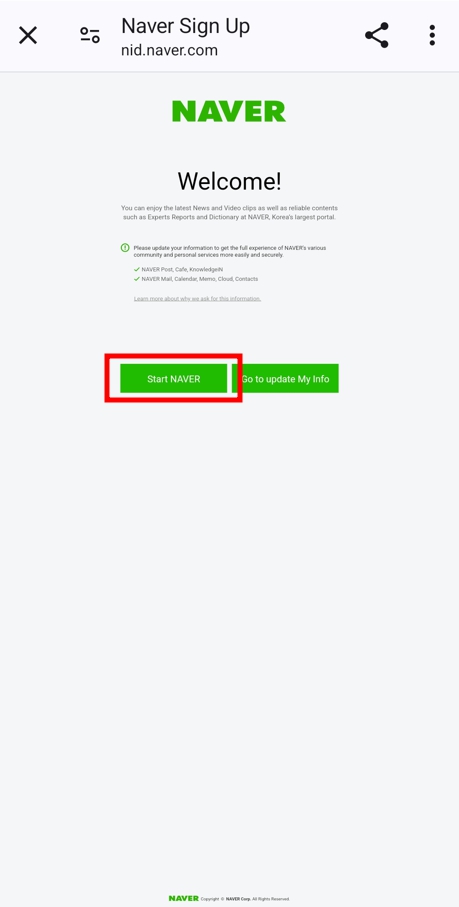
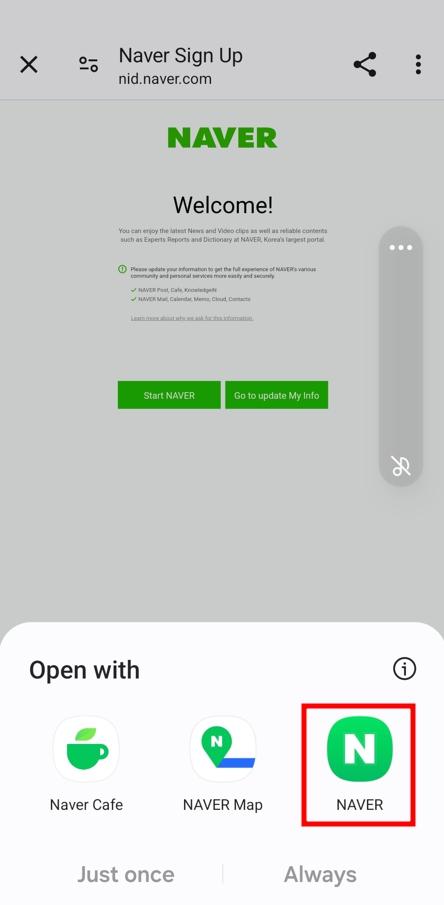
Your Nickname ID has been created. By pressing ‘Start NAVER’ and connecting to Naver, you can confirm that you are logged into Naver. When you log in with your Naver ID, it is automatically saved to Naver, Naver Maps, and other services. You can log in by clicking on the saved Naver ID or easily log in using your Google ID.
If you want to log in using your Naver ID and password, you must go through an additional step.
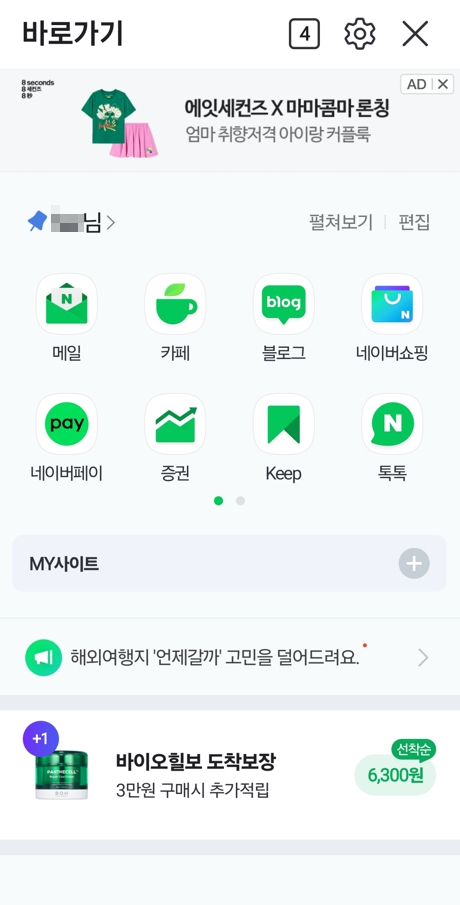
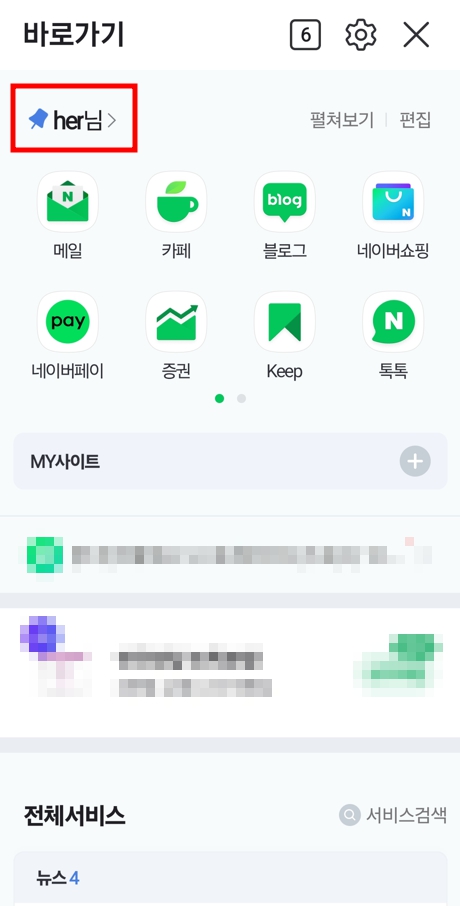
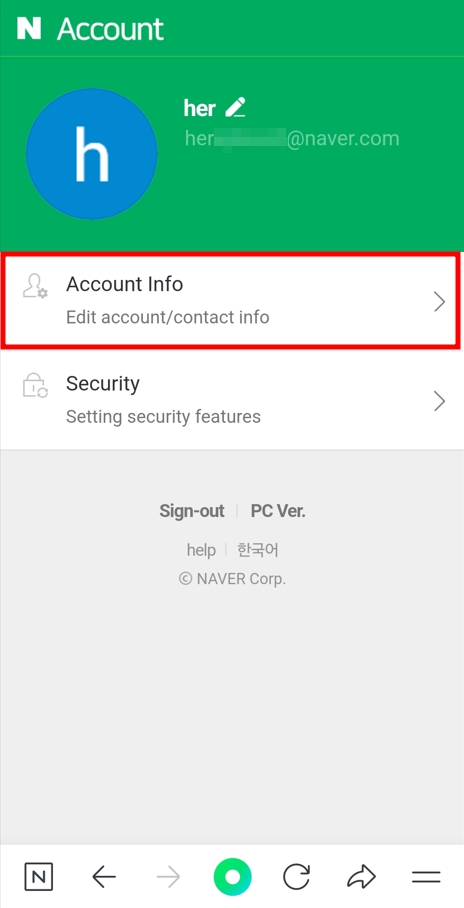
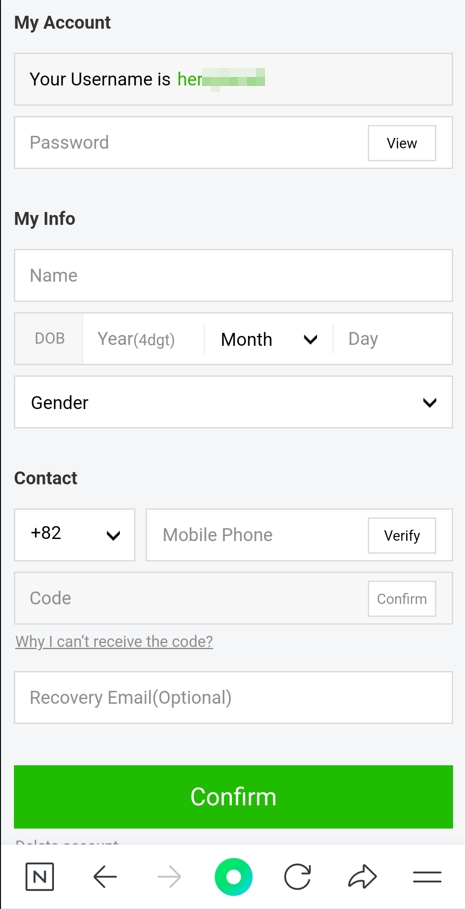
When you click on an ID on the shortcut page, the Account page appears, where you should click ‘Account Info’. A page that requires the same information as when creating a Nickname ID on the PC version will appear. After entering all the necessary information and clicking ‘Confirm’, the password setup will be completed. This process is identical to creating a Naver ID on the PC version, so please refer to the above for more details.
Final thoughts
We have explored how to sign up for Naver account. Naver is highly recommended for use during trips to Korea. Registering with your real name allows access to all services, including payment services, but requires identity verification, which can be cumbersome. Therefore, it is recommended for short-term travelers to use either a non-member login or create a nickname ID. If identity verification is possible using an i-PIN or a mobile phone registered in your name, we strongly recommend registering with your real name.

