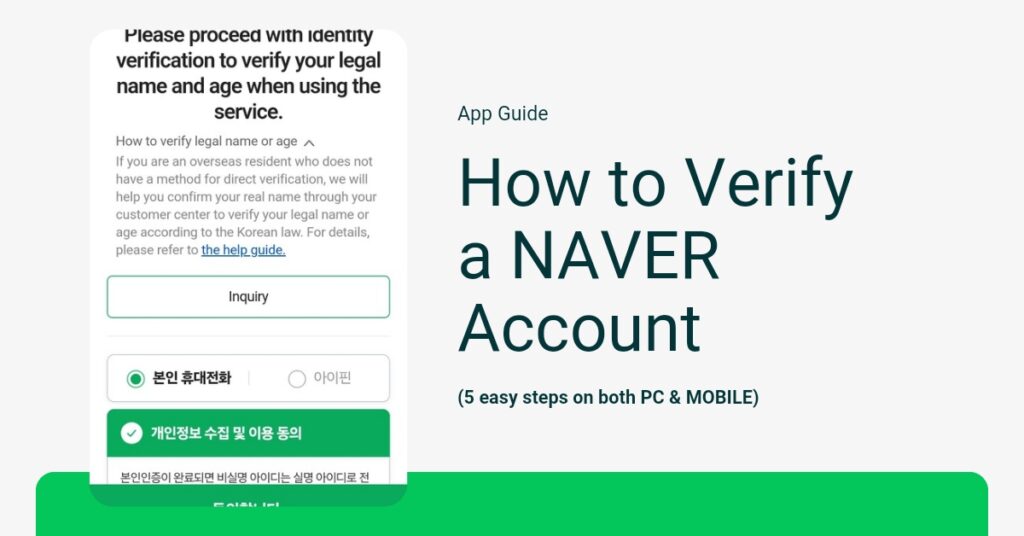
How to Verify a NAVER Account? Previously, we looked at how to create NAVER nickname ID. However, there are restrictions on the services that can be used with a nickname ID.
- Services available with a Nickname ID: Mail, blogs, messages, and other personal area services.
- Services not available with a Nickname ID: Shopping & Pay, MYBOX, VIBE, Series, Webtoons, Advertising (Integrated Advertising Center, Search Advertising, Performance-based Display Advertising), and other payment-included services.
Now, I will guide you on how to change a nickname ID to a real name ID on both PC and mobile environments. To change to a real-name ID, you must have a mobile phone, I-PIN, or identification documents registered in your name.
How to verify a NAVER account on pc environment
1) Log in to NAVER on a PC, then click the gear icon next to your ID.
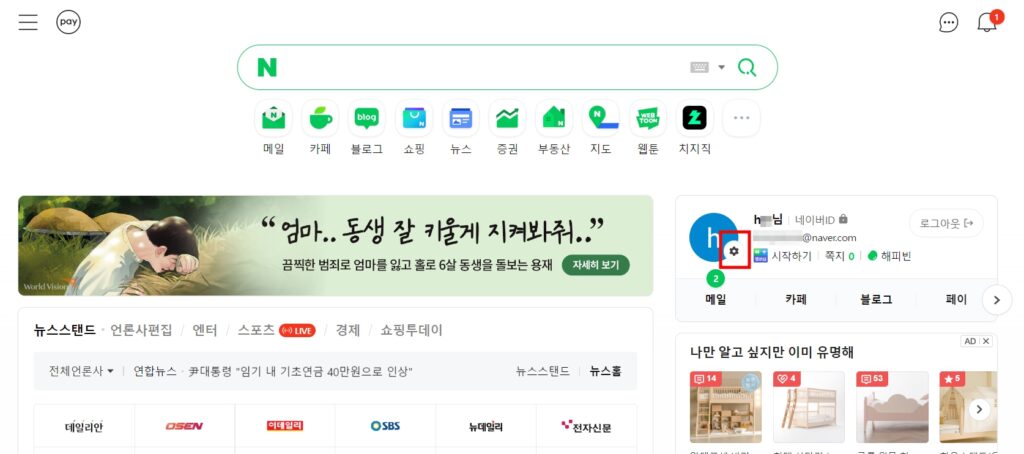
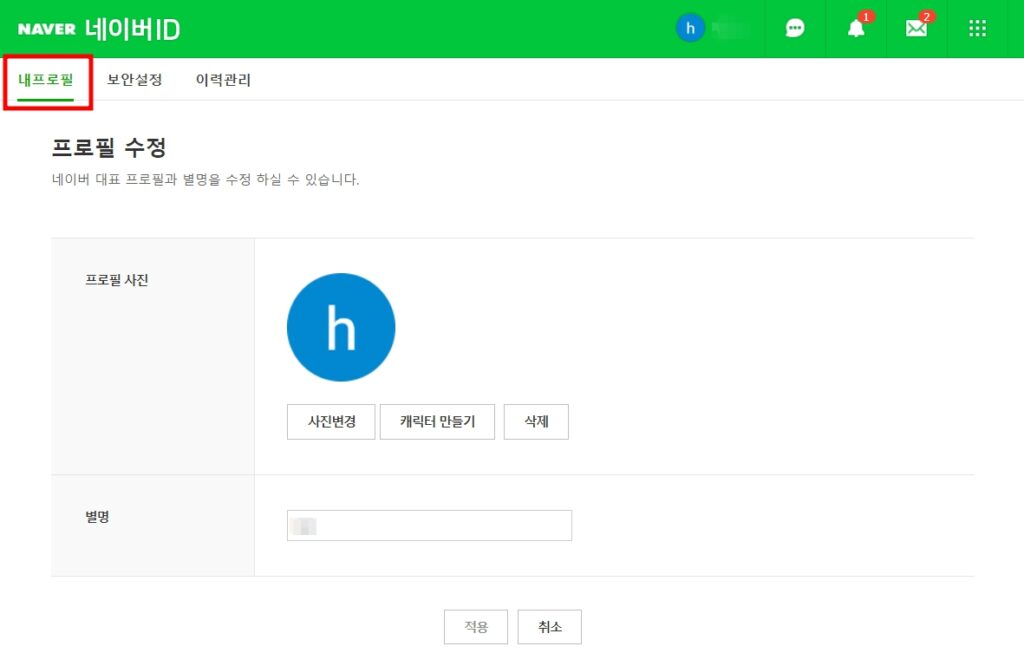
2) Click My Profile (내 프로필) in the top right corner.
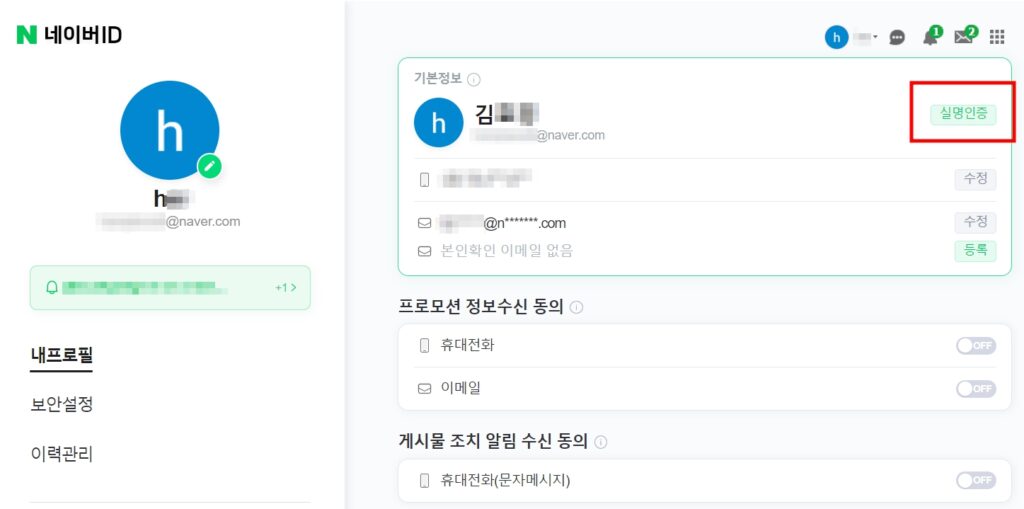
3) Click the real-name verification(실명인증) button next to the ID under “Basic Information(기본정보).”
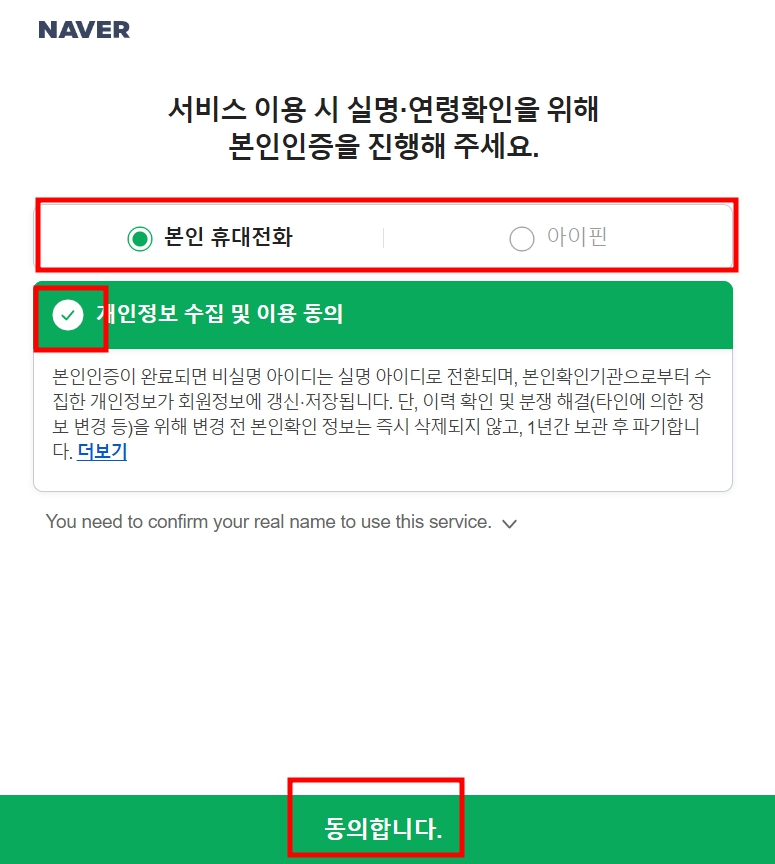
4) Choose a verification method using either your own mobile phone(본인 휴대전화) or i-PIN(아이핀), agree to the collection and use of personal information(개인정보 수집 및 이용 동의), and then click the ‘Agree(동의합니다)’ button.
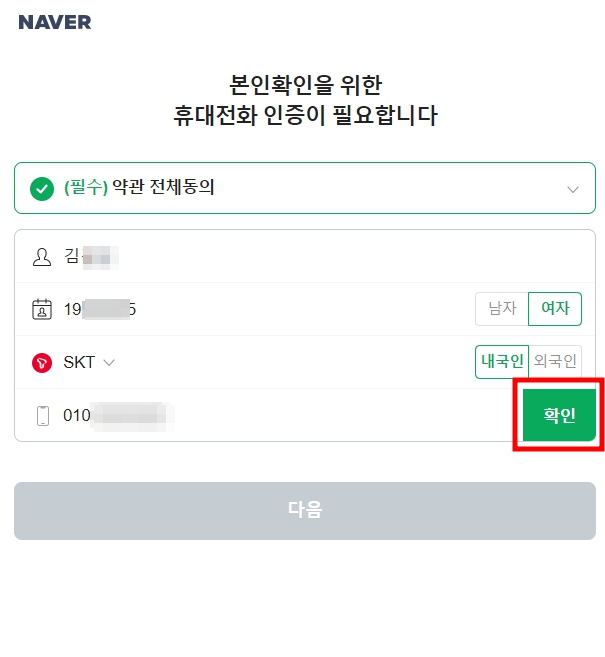
5) Agree to the mandatory terms and sequentially enter your name(이름), birthdate in 8 digits (e.g., 20020101)(생년월일 8자리), gender(남자,여자), and mobile carrier(통신사). Then choose between domestic or foreign nationality(내국인, 외국인), and enter your phone number(전화번호).
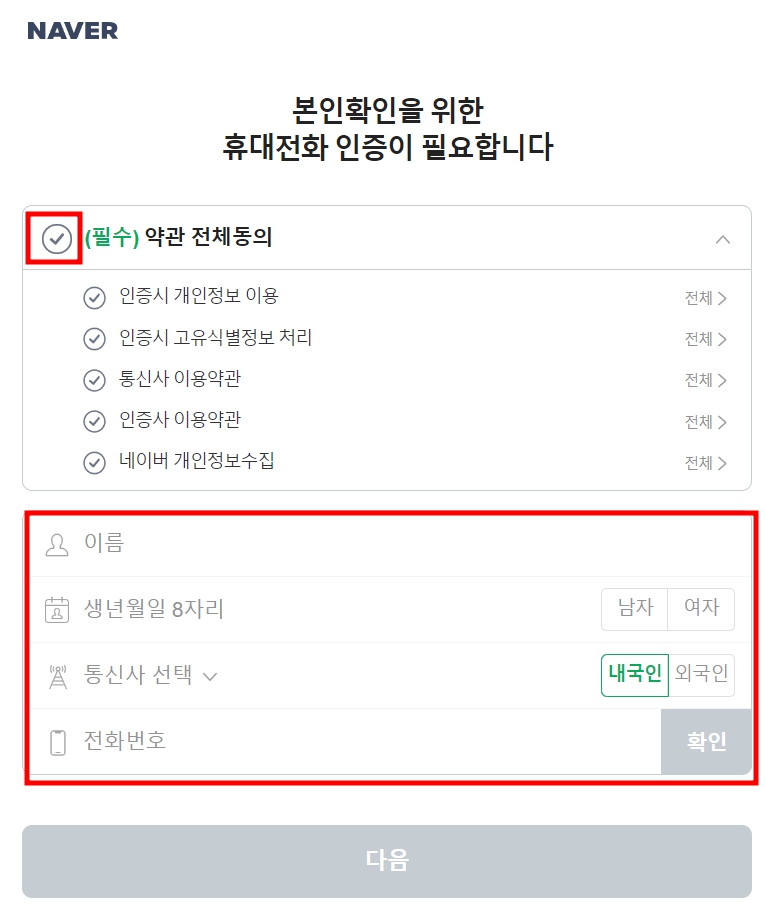
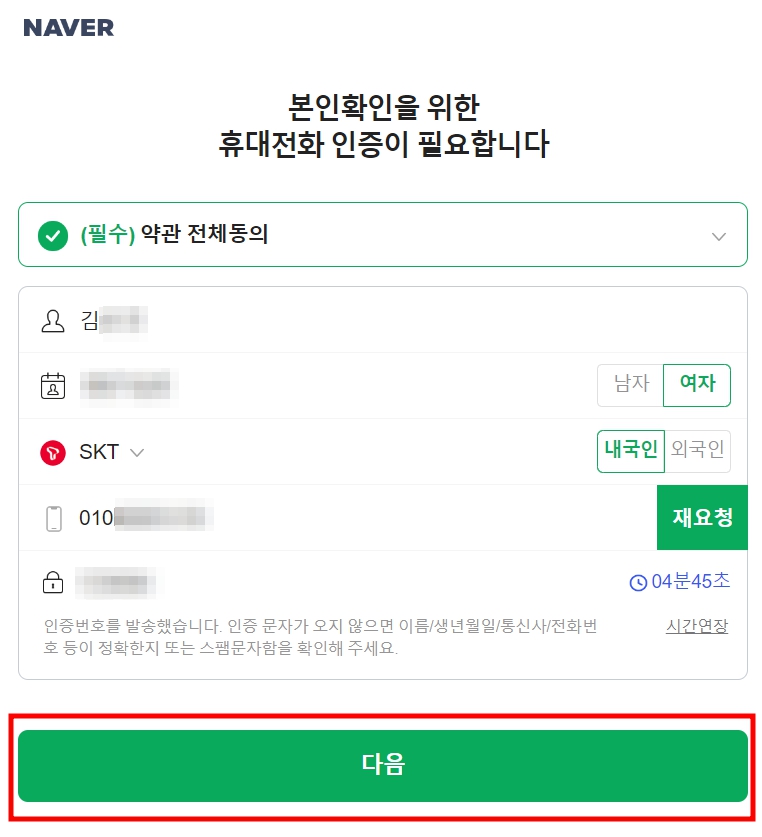
Once all information is entered, the ‘Confirm(확인)’ button will be enabled. Click ‘Confirm’ to create a field for entering the verification code, which will be sent to the phone number you provided. After entering the verification code and clicking ‘Next(다음)’, the switch to a real-name ID will be completed.
How to verify a NAVER account on mobile environment
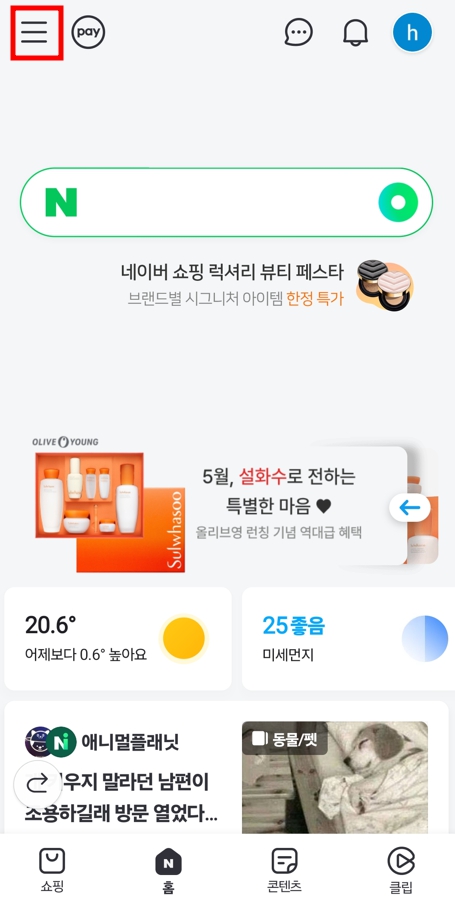
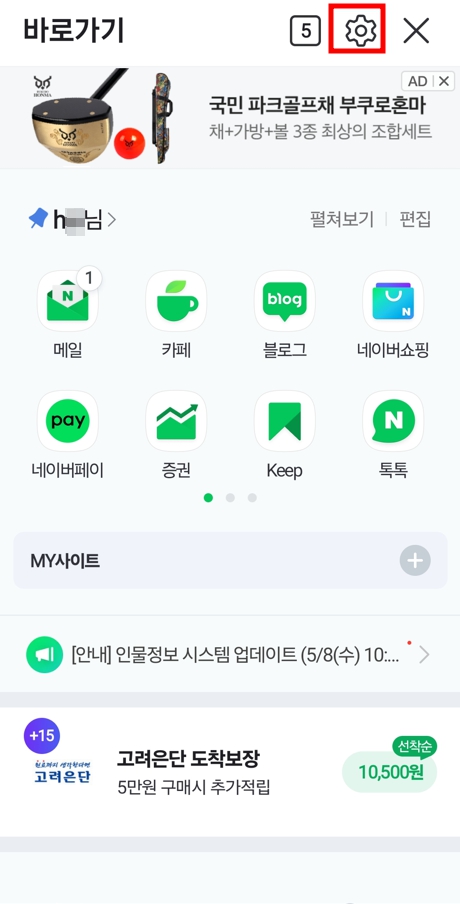
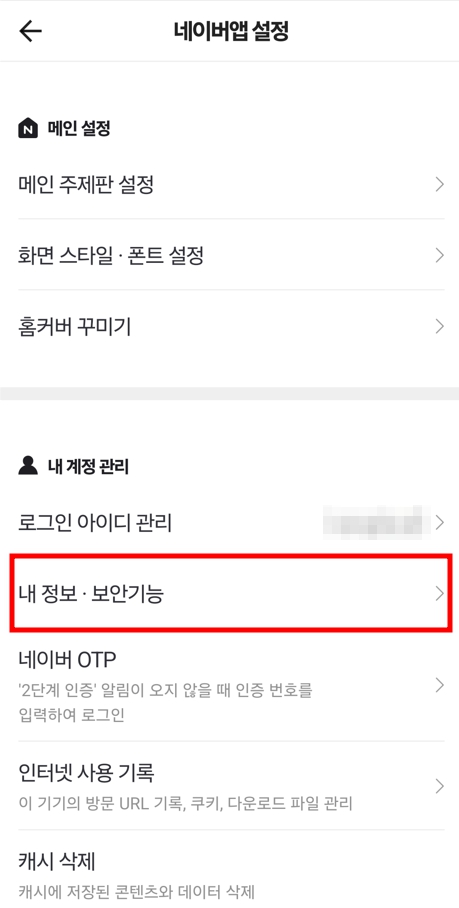
1) After logging in, click on the hamburger icon located at the top left corner of the search page. Then, on the shortcut page, click on the gear icon at the top right and access the ‘My Information Security Feature’ under the ‘Manage My Account’ menu.
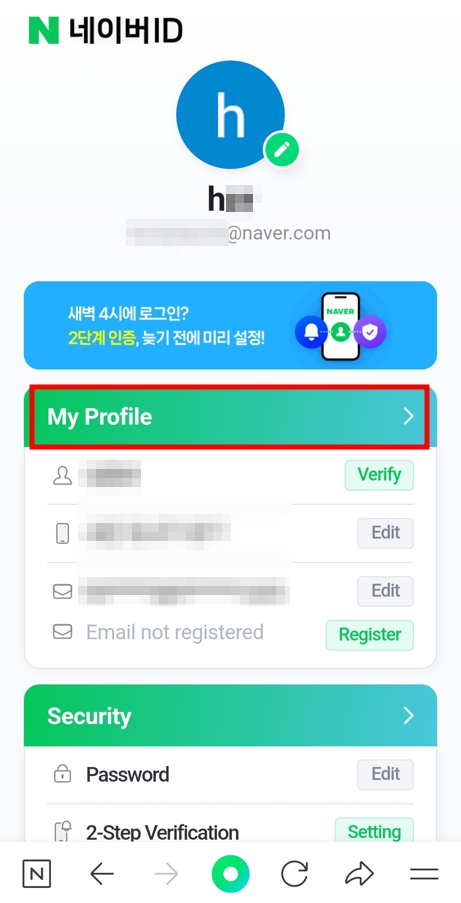
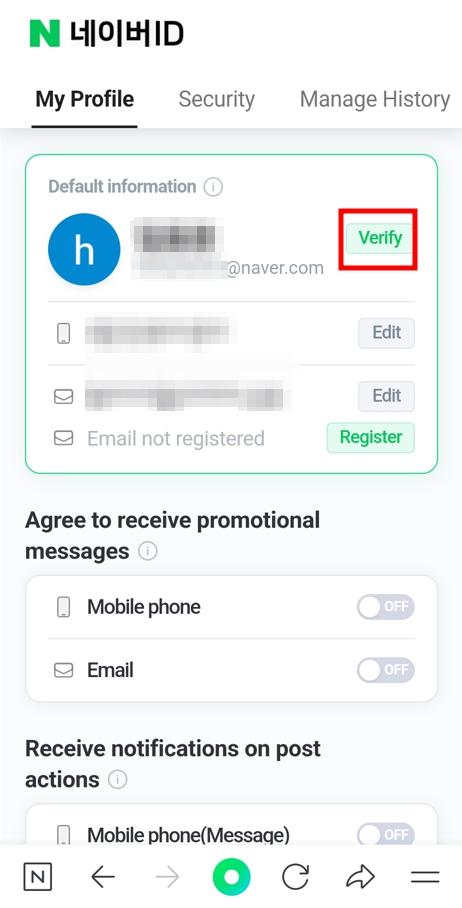
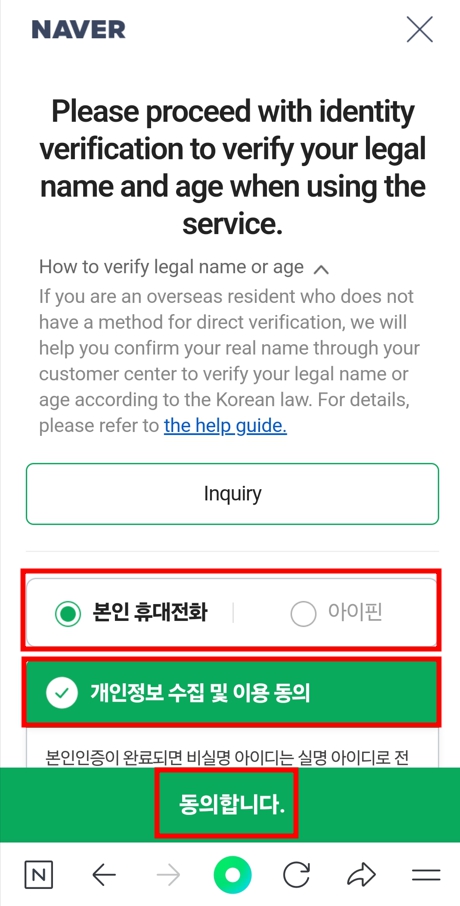
2) On the ‘My Profile’ page, click the ‘Verify’ button. On the ‘Verification’ page, choose your preferred method of identity verification, either through your mobile phone or I-PIN, and after confirming your agreement with the collection and use of personal information, check the checkbox and click the ‘Agree’ button.
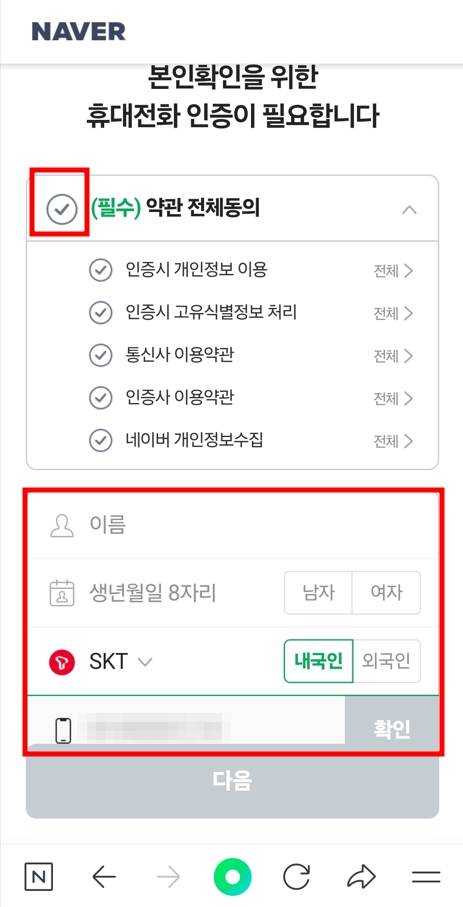
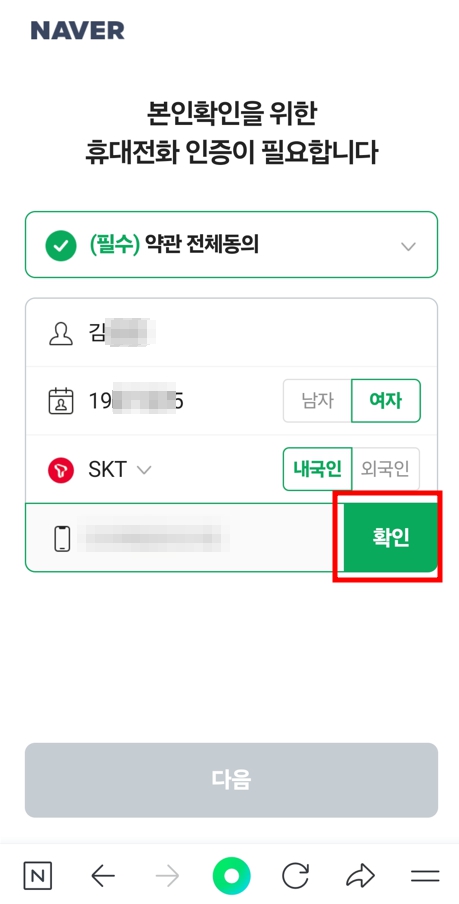
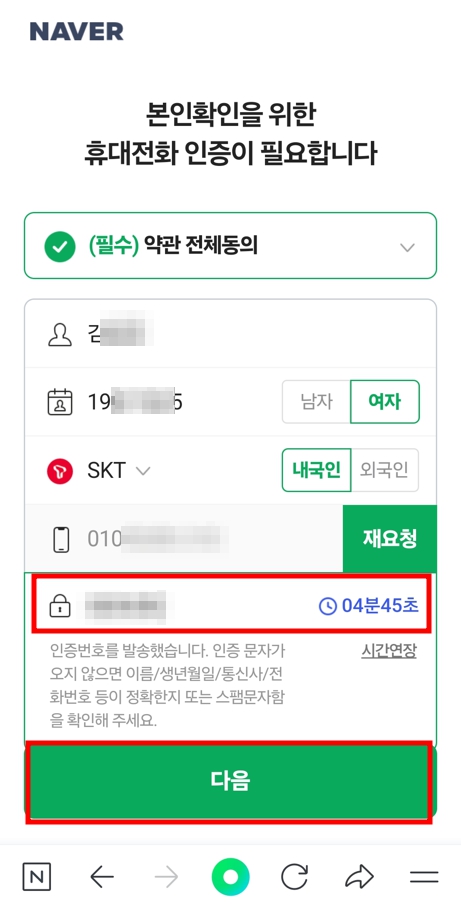
3) On the mobile phone verification page, agree to the mandatory terms and enter your name, date of birth, gender, mobile carrier, whether you are a domestic or foreign user, and your mobile phone number. Once these are entered, the confirm button will become active. Press this button to send a verification code to the entered mobile phone number. After entering the verification code and clicking the next button, the conversion to a real name will be completed.
How to verify a NAVER account with identification Documents
Foreign nationals who cannot verify their identity using I-PIN or a mobile phone registered in their name, as well as South Korean nationals living abroad, can receive assistance from the customer service center by submitting identification documents.
1. Foreigners (with an alien registration card)
2. Foreigners (without an alien registration card)
Detailed information can be found at the NAVER Help.

Final thoughts
We have explored “how to verify a NAVER Account”. The main difference between a real-name ID and a nickname ID on NAVER is whether you can use services that include a payment system. By switching to a real-name ID, you gain access to a payment system, allowing you to use a wide range of services including almost all types of reservation services, NAVER Pay, and NAVER Shopping. This provides great convenience during travel in Korea.

